In those types of cases, you have to change the drive letter for the device and it will normally pop right up. In this article, I’ll show you how to change the drive letter for these devices using the GUI and also via the command prompt.
Change Drive Letter via Disk Management
You can open disk management on a Windows PC by either right-clicking on the Computer or This PC icon on the desktop and choosing Manage or by clicking on Start and typing in diskmgmt.msc.
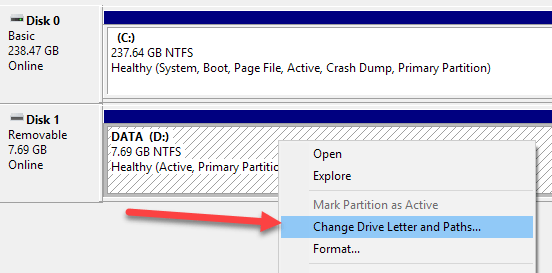
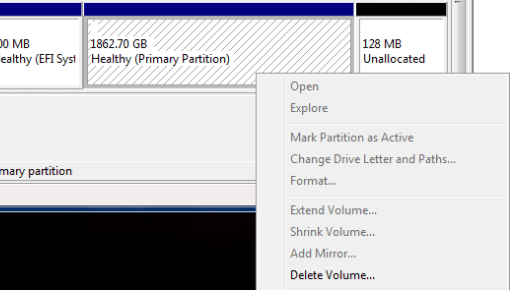
You’ll see a list of volumes at the top and the disks and partitions at the bottom. Any partition that has a drive letter will be shown in the white area. If you connected a USB drive and you see it listed, but it doesn’t have a drive letter, you can now assign one. To assign or change the drive letter for a disk or partition, simply right-click on it and choose Change Drive Letter and Paths.
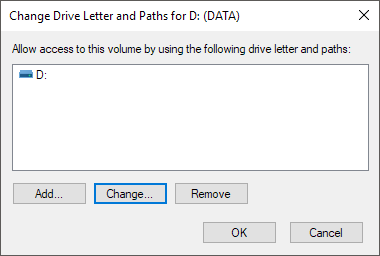
A window will pop up with the current drive letter, if there is one, and a couple of options. Here you want to click on Change.
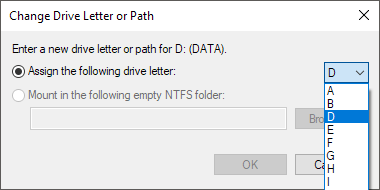
Next, you will choose the new drive letter from the dropdown list. You can pick from the letters A to Z.
That’s about it. Click OK to close out all the dialogs and the drive should now show up in Windows with the new drive letter. If you’re having issues using the GUI interface or you simply feel more comfortable using the command prompt, read the instructions below on how to use diskpart.
Use DiskPart to Assign Drive Letter
If you need to change or assign a drive letter via the command prompt, you have to use the diskpart command. I’ve written a bit on how to use diskpart, which is really useful for many disk management tasks. To get started, open an administrator command prompt in Windows by clicking on Start, typing in CMD and then right-clicking and choosing Run as Administrator.
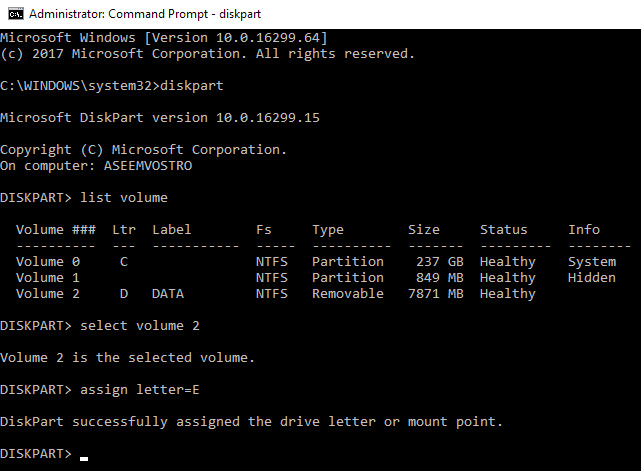
Now type in the following commands, each followed by the Enter key. Above, you’ll replace x with the volume number in the list that corresponds to the drive you want to change and with the letter you want to assign to the drive. Here are the commands I ran for an external USB drive:
You’ll also notice that under the Type column, external drives will show up as Removable. That’s a good way to check before you select a volume. You can also figure out which drive is correct by looking at the size and also looking at the Info column. Volume 0 in my case is the system partition, so I wouldn’t want to mess with that by accident. Overall, it’s a fairly simple process and hopefully you won’t run into any problems. There are times, however, when things don’t work properly. Below are some possible reasons.
Troubleshoot Can’t Change Drive Letter in Windows
One problem that I have seen is that the Change Drive Letter option is simply greyed out. This can occur for a few reasons. One of the main reasons is the volume is not formatted in FAT or NTFS format. For example, if you are attaching a disk from a Mac computer, you will not be able to change the drive letter unless you format the drive into a compatible format. Another reason is if the drive is set to read-only. If so, you’ll have to Google the steps to change the drive to allow read/write access.
Also, if you don’t need any of the data on the volume in question, a simple solution is to delete the volume, which is normally never greyed out. Once you delete the volume, you can right-click again and create a new simple volume. Now you will be able to change the drive letter. Make sure to read my other tips on how to hide drive in Windows and how to map a folder to a drive letter in Windows. If you have any questions, feel free to comment. Enjoy!

